| LCD Pin | LCD Function | Pi Function | Pi Pin no. |
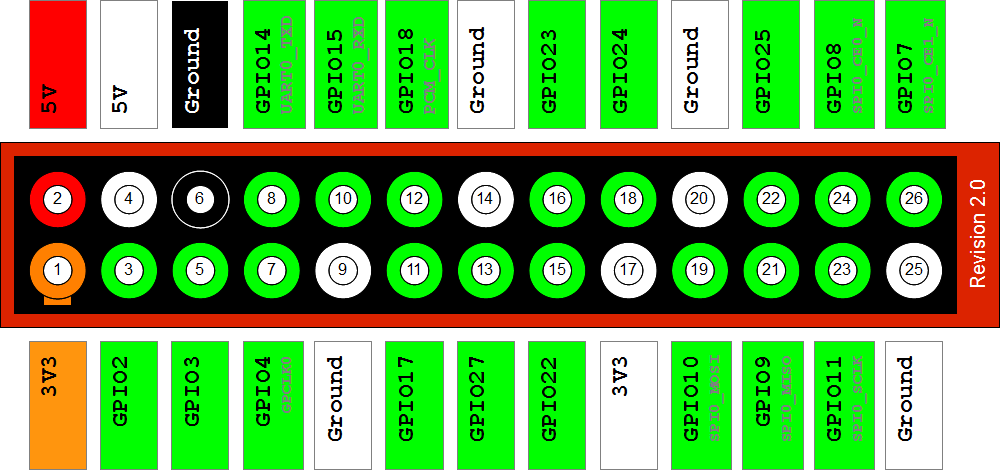
| L+ | +5v | +5v | P1-02 |
| L- | GND | Connect to PNP transistor | Transistor Collector pin |
| 1 | GND | GND | P1-06 |
| 2 | +5V | +5V | P1-02 |
| 3 | RS | GPIO 7 | P1-26 |
| 4 | RW | GND | P1-06 |
| 5 | E | GPIO 8 | P1-24 |
| 6 | Data 0 | Not used | N/A |
| 7 | Data 1 | Not used | N/A |
| 8 | Data 2 | Not used | N/A |
| 9 | Data 3 | Not used | N/A |
| 10 | Data 4 | Not used | N/A |
| 11 | Data 5 | GPIO 25 | P1-22 |
| 12 | Data 6 | GPIO 24 | P1-18 |
| 13 | Data 7 | GPIO 23 | P1-16 |
| 14 | Data 8 | GPIO 18 | P1-12 |